In this blog post we delve deeper into how to build a template compatible with the Template Manager in Eloqua 10, how to select it for use in an email campaign and how to populate it with custom content using the content editor.
The Template Manager is located in the Email Launchpad area of Eloqua and enables you to create templates for your emails which ‘lock down’ key areas from the everyday user. This simply protects areas, such as wrapper tables and responsive HTML coding, from being deleted or changed by someone using it for an email send.
Building The Template
Building a template that can be used in the Template Manager is actually a rather simple process and requires just a few additional tags added to the coding of the template to make areas editable.
The way that Eloqua defines areas which can be edited within the template is through the use of two selectors – elq-edit=”true” and elq-delete=”true”, depending on whether you want users to be able to edit the content of an area or just to have the option of removing it. Anything without these tags will be locked down, enabling the remainder of your template to remain robust.
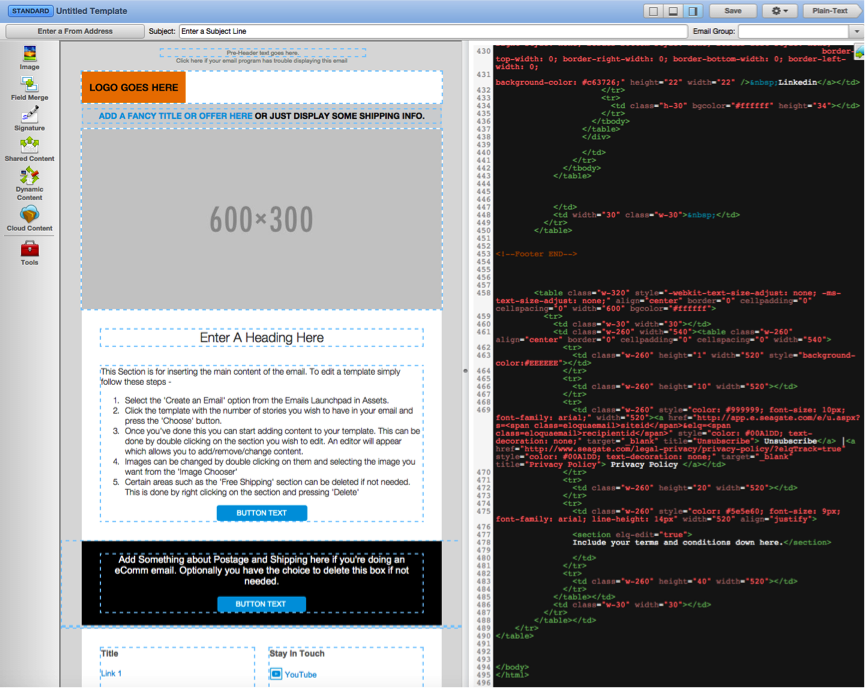
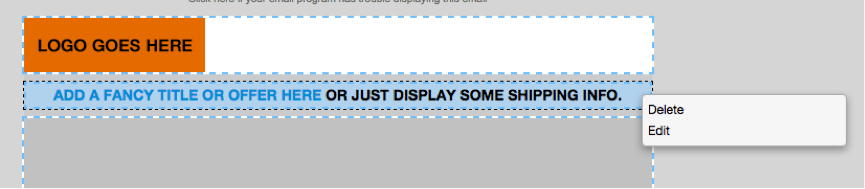
Adding one or both of these to a tag will create a blue border around the element in Eloqua, which shows the user that the element can be edited when the template is selected for use. The below image shows how the Template Manager looks when a template is added, with the blue border around the defined editable or deletable areas.
Here is a section of our code below which shows the elq-edit=”true” in conjunction with our standard HTML coding –
<tr>
<td bgcolor="#000000" style="font-size: 14px; color: #ffffff; font-family: arial;" align="center">
<section elq-edit="true">
<span style="font-size: 16px; color: #ffffff; font-family: arial;"> Add Something about Postage and Shipping here if you're doing an eComm email. Optionally you have the choice to delete this box if not needed.</span>
<table cellpadding="0" cellspacing="0" class="center-button">
<tbody>
<tr>
<td align="center" style="background: #00A1DD; font-family: arial, sans-serif; font-size: 12px; color:#ffffff !important; -moz-border-radius: 4px; border-radius: 4px; padding:4px 2px; line-height:12px"><a style="text-decoration: none; color: #ffffff; display: inline-block; border-top: 3px solid #00A1DD; border-bottom: 3px solid #00A1DD; border-right: 25px solid #00A1DD; border-left: 25px solid #00A1DD;" href="#"> BUTTON TEXT </a></td>
</tr>
</tbody>
</table>
</section>
</td>
</tr>
As you can see the elq-edit=”true” selector is not actually on the table tag but is instead on a section tag. This is primarily to protect the inline styling and classes you’ve placed on the table-related tags as the editor can still access some source code of the template. We will discuss this later on in the blog post when exploring the content editor.
We’ve used <section> as our wrapper around the editable text, but there are other tags you can use as follows –
- Div
- Section
- Header
- Footer
- Article
- Blockquote
- Aside
- Details
- Summary
- Figure
- Figure Caption
- Nav
- Headers (h1, h2, h3, h4, h5, h6)
- Img
Once you’re happy with how the template looks in the Template Manager, enter a subject line and press save. This will achieve two things – the first being that a default subject line will be used whether the template is selected for use (this can then be changed by the user in both the Template Manager and the email if it’s not correct for the type of email being created) and second being it will put the template into ‘protected’ mode. This means that when the template is selected in an email the user won’t be able to edit any of the template other than the areas defined with elq-edit=”true” or elq-delete=”true”.
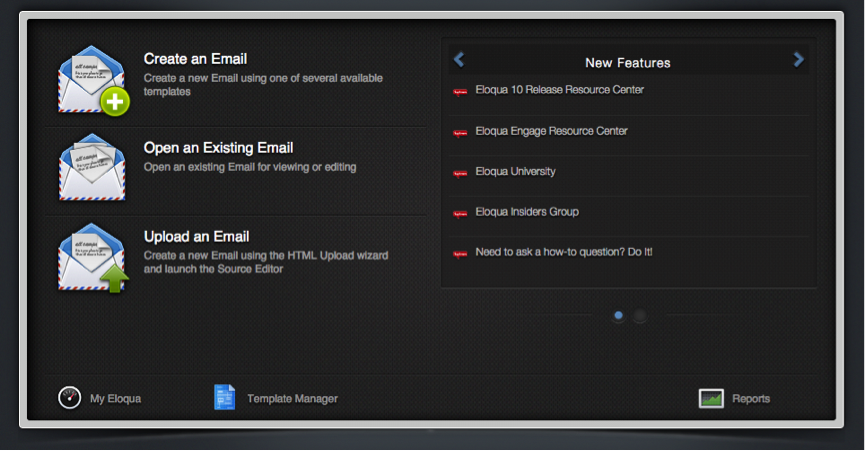
Selecting the template
When it comes to selecting a template to use in an email this can be done where you would normally go to create a new email. Usually the options given are ‘blank email’ or ‘blank HTML email’ but with templates set up you now have the option to select those as your base. It should appear next to the default options but if not a simple search for the template via the search bar should do the trick. Once you’ve selected your template and pressed ‘Choose’ your email will look similar to the one below –
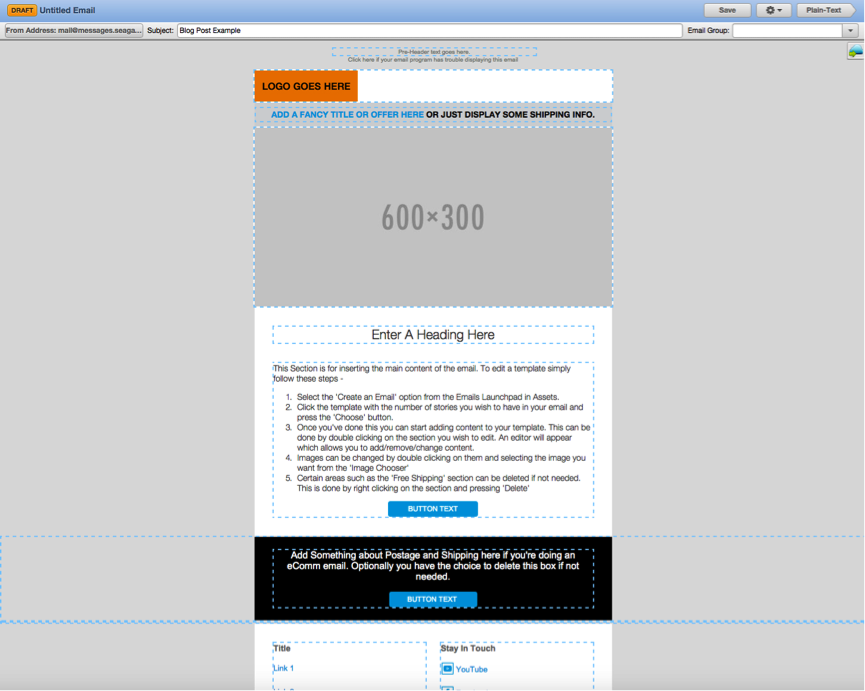
The source code of the email is hidden and you have a full screen view of the template with the editable areas marked out by the blue borders. All other features like testing and selecting an email group are exactly the same as a regular email.
Now that the template is loaded into the email it’s just a case of editing the content to reflect the needs of the specific email send. Fortunately this is an easy process and can be done via the content editor.
Editing the template
Double clicking on an editable area or right clicking on an area and pressing edit allows you to edit the content. The content editor works in a similar way to a standard WYSIWYG editor and therefore doesn’t require expert knowledge of HTML and CSS to add text, images or links. It’s important to note that unless specified directly in the editor by yourself the content you add will take on the appearance defined in your inline styling despite how it looks in the editor.
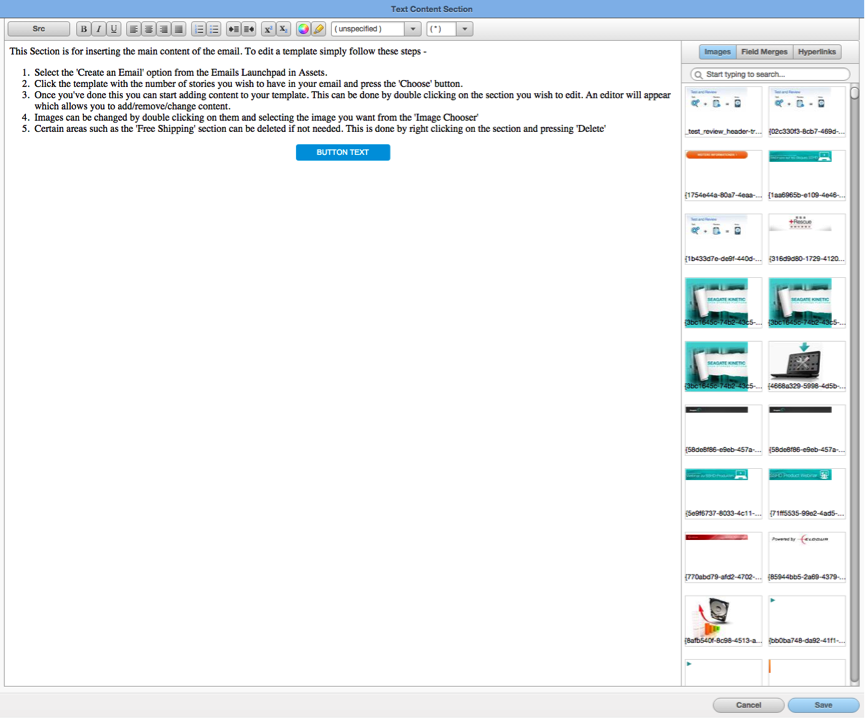
We talked earlier about how certain source code can still be viewed and edited via the content editor and this is down to the ‘src’ button in the top left hand corner. This button will toggle the editor between showing the source code of the section selected and everything inside it and the WYSIWYG editor. This button is the reason why we recommended putting the elq-edit=”true” on a new tag rather than any table-related tags as it further safeguards breaking of the template and the styling. We only recommend using this button if you have some knowledge of HTML and CSS.
If you want to delete a section rather than edit it then you need to right click on an editable section and press the delete option. It’s important to note that only sections with the selector elq-delete=”true” on them can be deleted and once a section is deleted you can’t undo the process so caution is the best approach here.
When considering when to use the delete function we tend to only add it to the “extra” areas of the template, such as extra product rows or an optional shipping info bar. This limits the risk of deleting something important which after all is the main reason for using the Template Manager.
Once you’re happy with how the template looks hit the save button and send yourself a test email to admire your work in the email client of your choosing.
Conclusion
The Template Manager is a very usable tool in Eloqua. It gives you the freedom to create the templates you want and also safeguards them against any game-breaking edits for people less knowledgeable in HTML and CSS. We encourage anyone who uses Eloqua on a regular basis to give it a try and see the results for themselves.
